
Did you know that you can cut your own picture mats!?
It’s easy, I promise!
The husband would accuse me of (incorrectly) saying this about a lot of things…and honestly, there were moments in doing this DIY that I thought it would be more worth it to buy. But, I went through the learning process and the mistakes so you don’t have to.
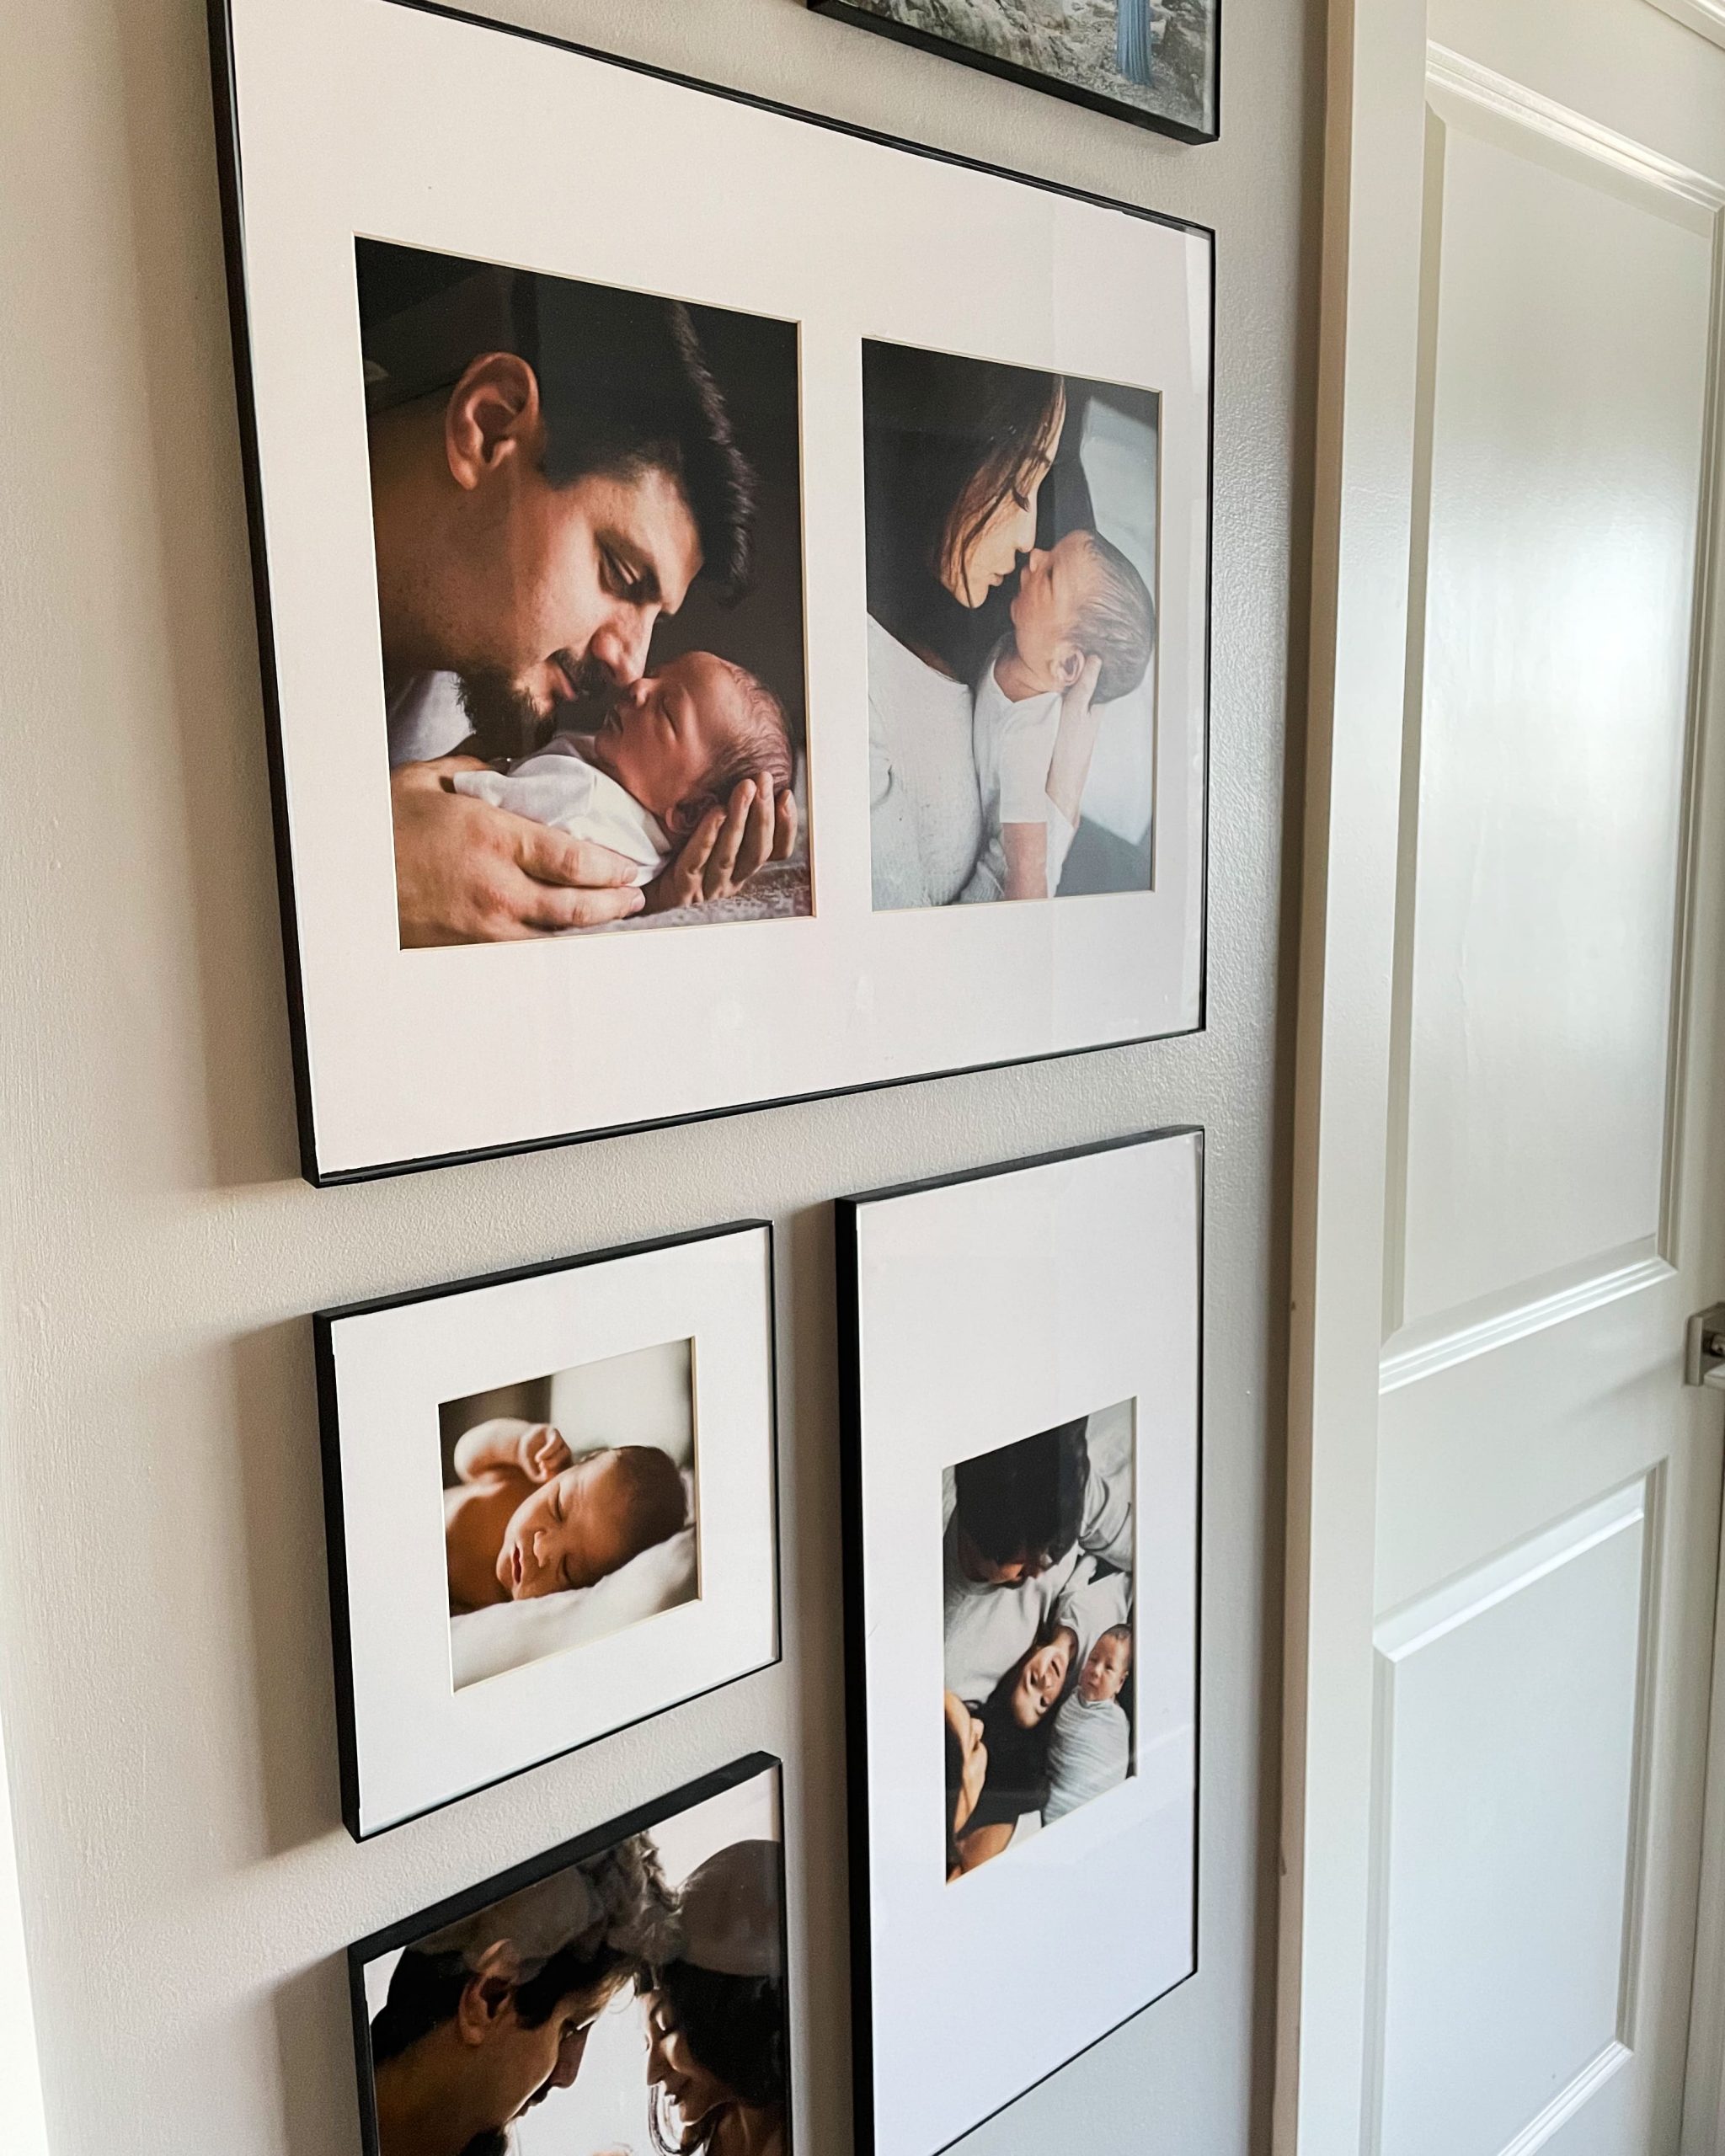
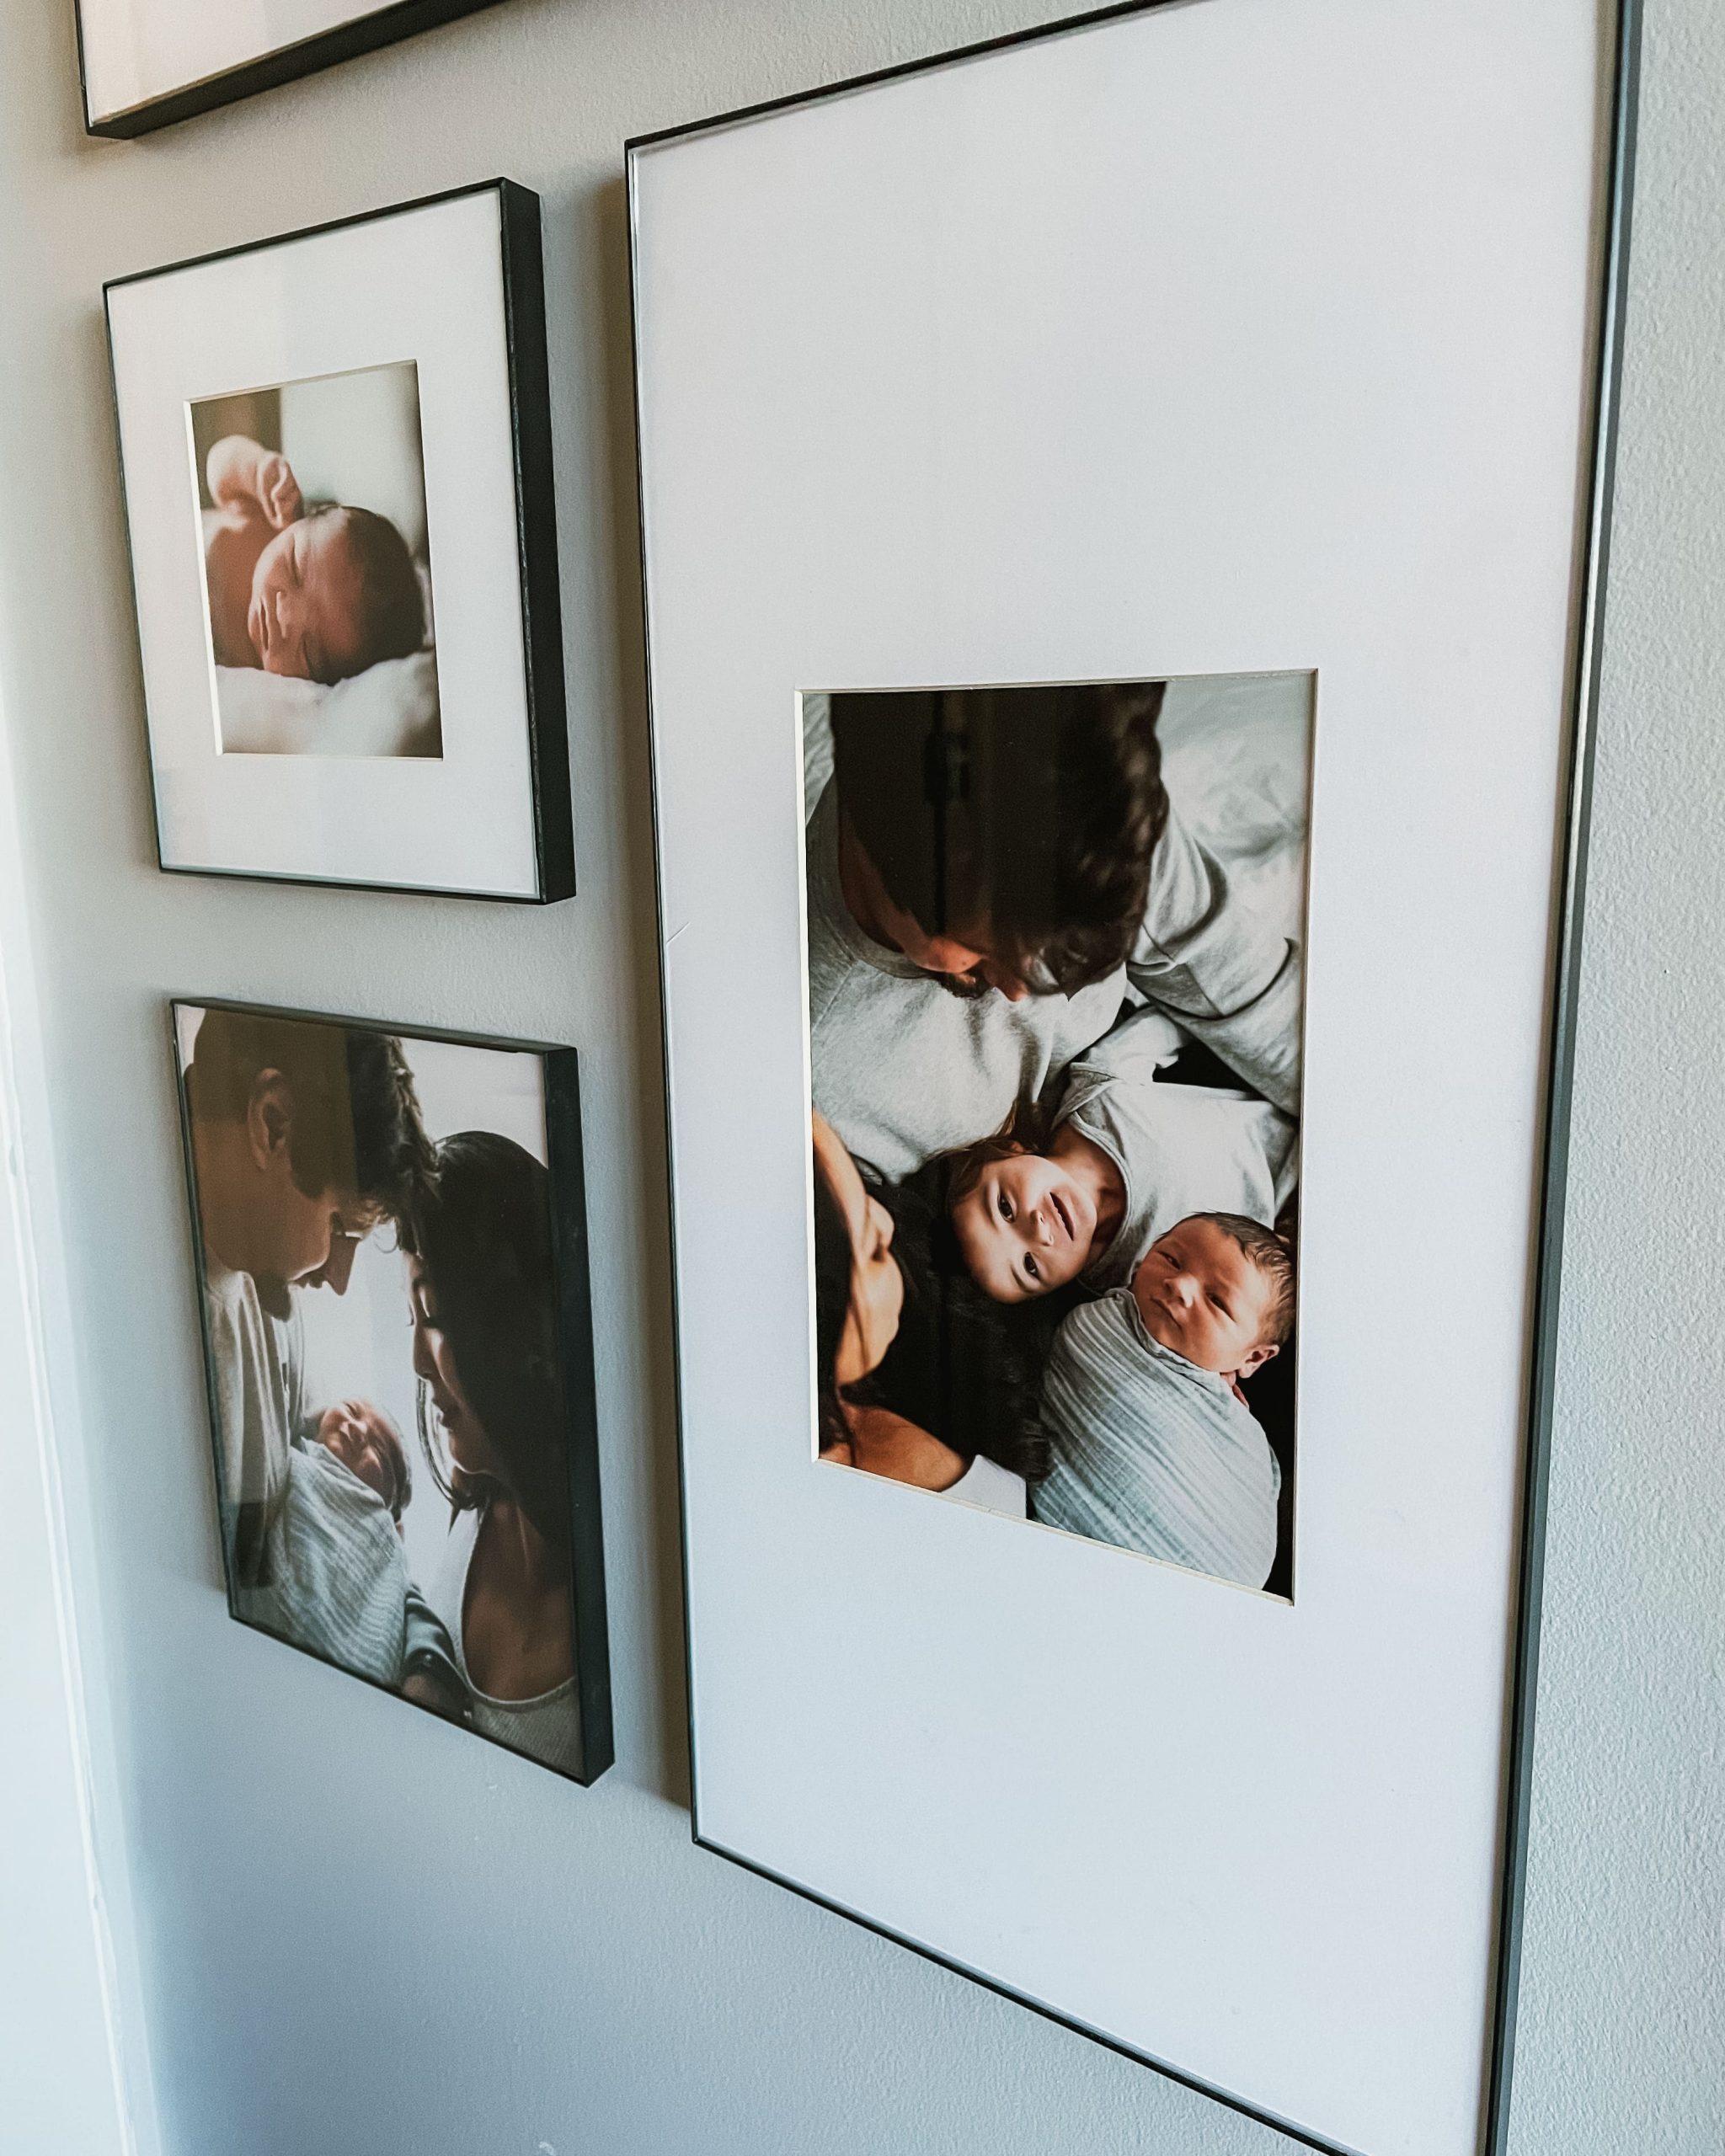
This week I completed framing some beloved family photos and created my minimalist gallery wall. Which I am OBSESSED with, in case you didn’t know already. I continue to admire the display of our boys’ newborn photos in their sleek gallery frames every day. I was going for a very specific look and was having a hard time finding frames that were the exact size, with the exact size of mat boards and at a reasonable price point.
So as with all the times I’ve run into such a conundrum, I decided to take the DIY route to make all my gallery wall dreams come true.
Ok, let me show you how to cut your own custom picture mats!
Disclosure: this post contains affiliate links, including Amazon Affiliate links. An affiliate link means I may earn an advertising fee if you make a purchase through my link without any extra cost to you. This helps to keep this little blog alive, so thank you! For additional information, please view my privacy policy.
Supplies needed to cut custom picture mats
- thin black frames in various sizes. I used these ones from Michael’s in the following sizes:
- 2 – 8×8 (2 x $7.49 = $14.98)
- 2 – 8×10 (2 x $7.49 = $14.98)
- 1 – 16×20 ($13.99)
- 1 – 10×20 ($13.99)
- 2 – 20×32 white mat board (2 x $11.99 = $23.98)
- acrylic ruler ($10.13)
- rotary cutter ($15.37)
- mat board cutter ($37.32)
- self healing cutting mat ($55.27)
- pencil
Total cost of this project (assuming you have a pencil already and not including the photo prints…) = $200.01
I dunno, does that seem like a lot??
At first glance, it did to me…but then I looked up other gallery wall framing options and the above cost is about 20% of the cost of other options! So, I call that worth it!

Before you begin…
Before you start this project, take some time to review the written instructions that come with the mat board cutter.
There is a piece of anti-slip material that comes with the particular tool that I’ve linked above. Definitely use this and stick it to the backside of your acrylic ruler. I made the mistake of not doing this and it resulted in a few crooked cutouts. Don’t be me.
Secondly, test the proper depth setting on your cutting tool. Test a few cut lines on a scrap piece of mat board before starting to ensure the blade cuts through the board.
Cut the mat board down to size
Using the piece of paper or stock family photo that comes inside the picture frame as a guide, cut your mat board to the proper size with the rotary cutter.
PRO TIP: use the acrylic ruler to help you get a straight line. There were many times where my rotary cutter strayed and it was frustrating as heck to have to start all over. Once again…don’t be me.
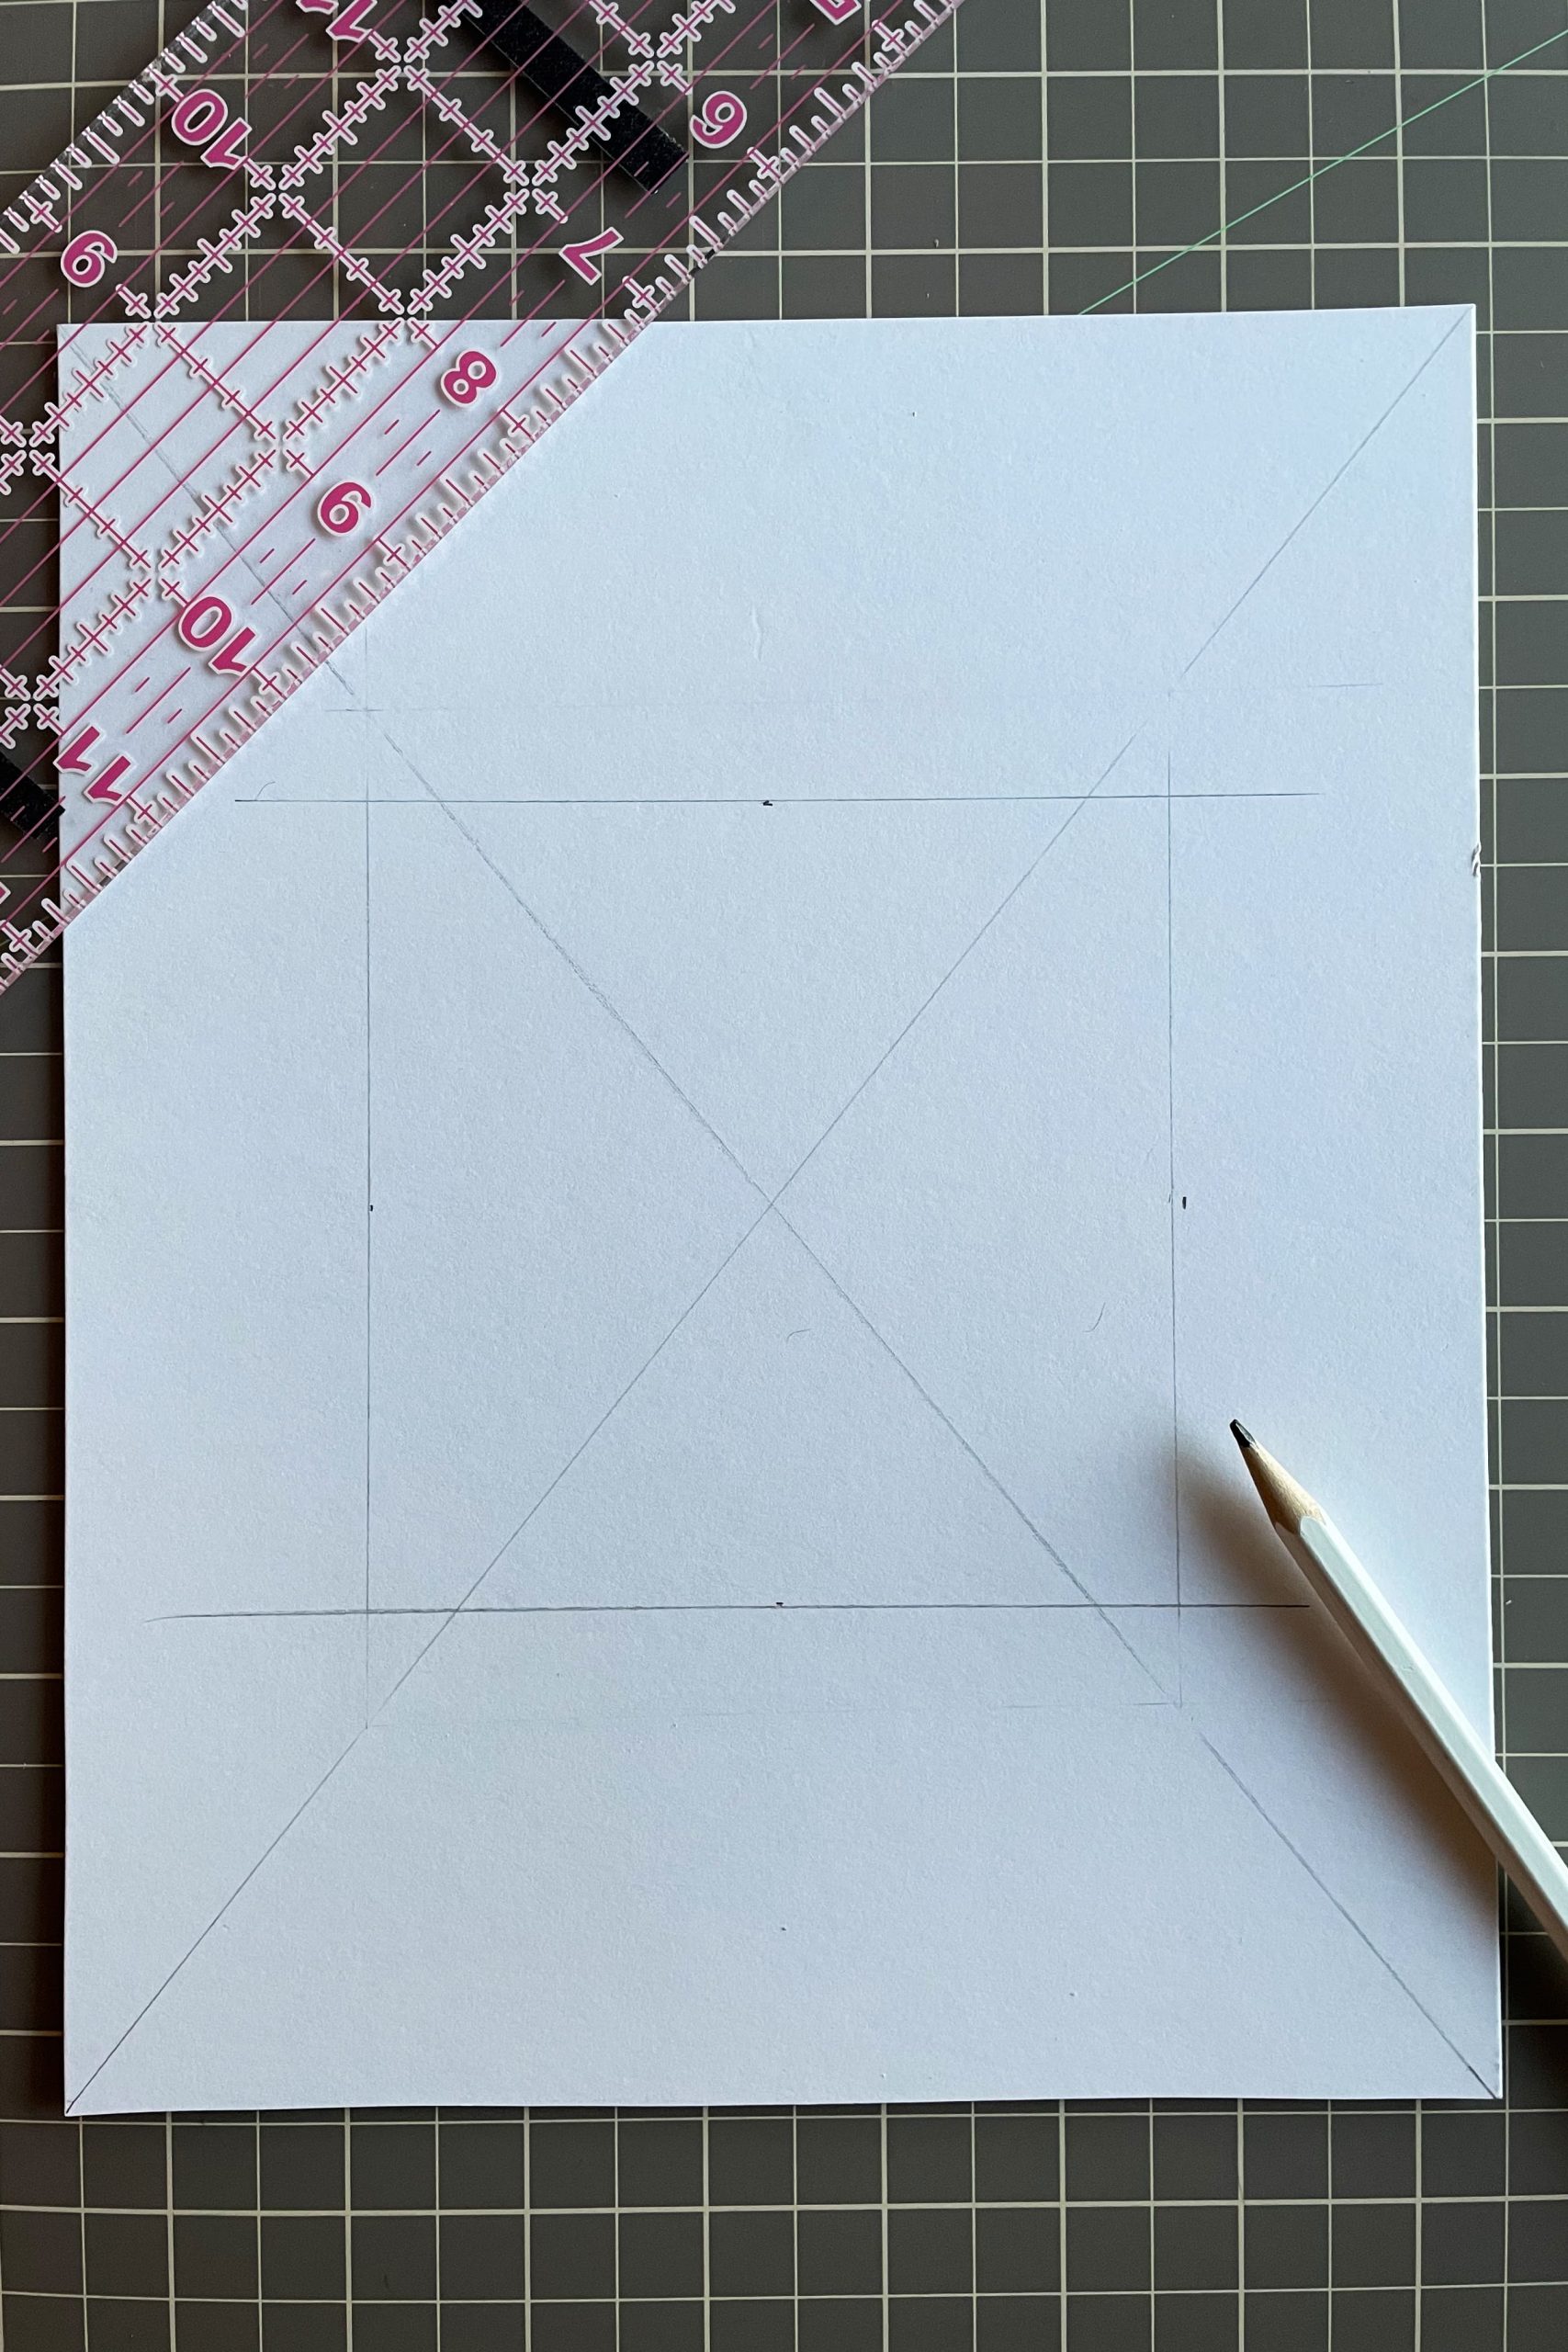
Mark the cutout for the photo
This part takes the longest and the most planning.
On the BACKSIDE of your mat board, mark an X from corner to corner with a pencil. Doing this just properly marks your centre point. Use your acrylic ruler to ensure straight lines.

Plan for the photo opening size. If you are framing an 8×10 photo, then your cutout will be 7.5″x9.5″, and so on and so forth.
Divide your opening measurement in half and mark this measurement out from the centre point. Draw your box for the opening in the mat board using these marks as your guide.
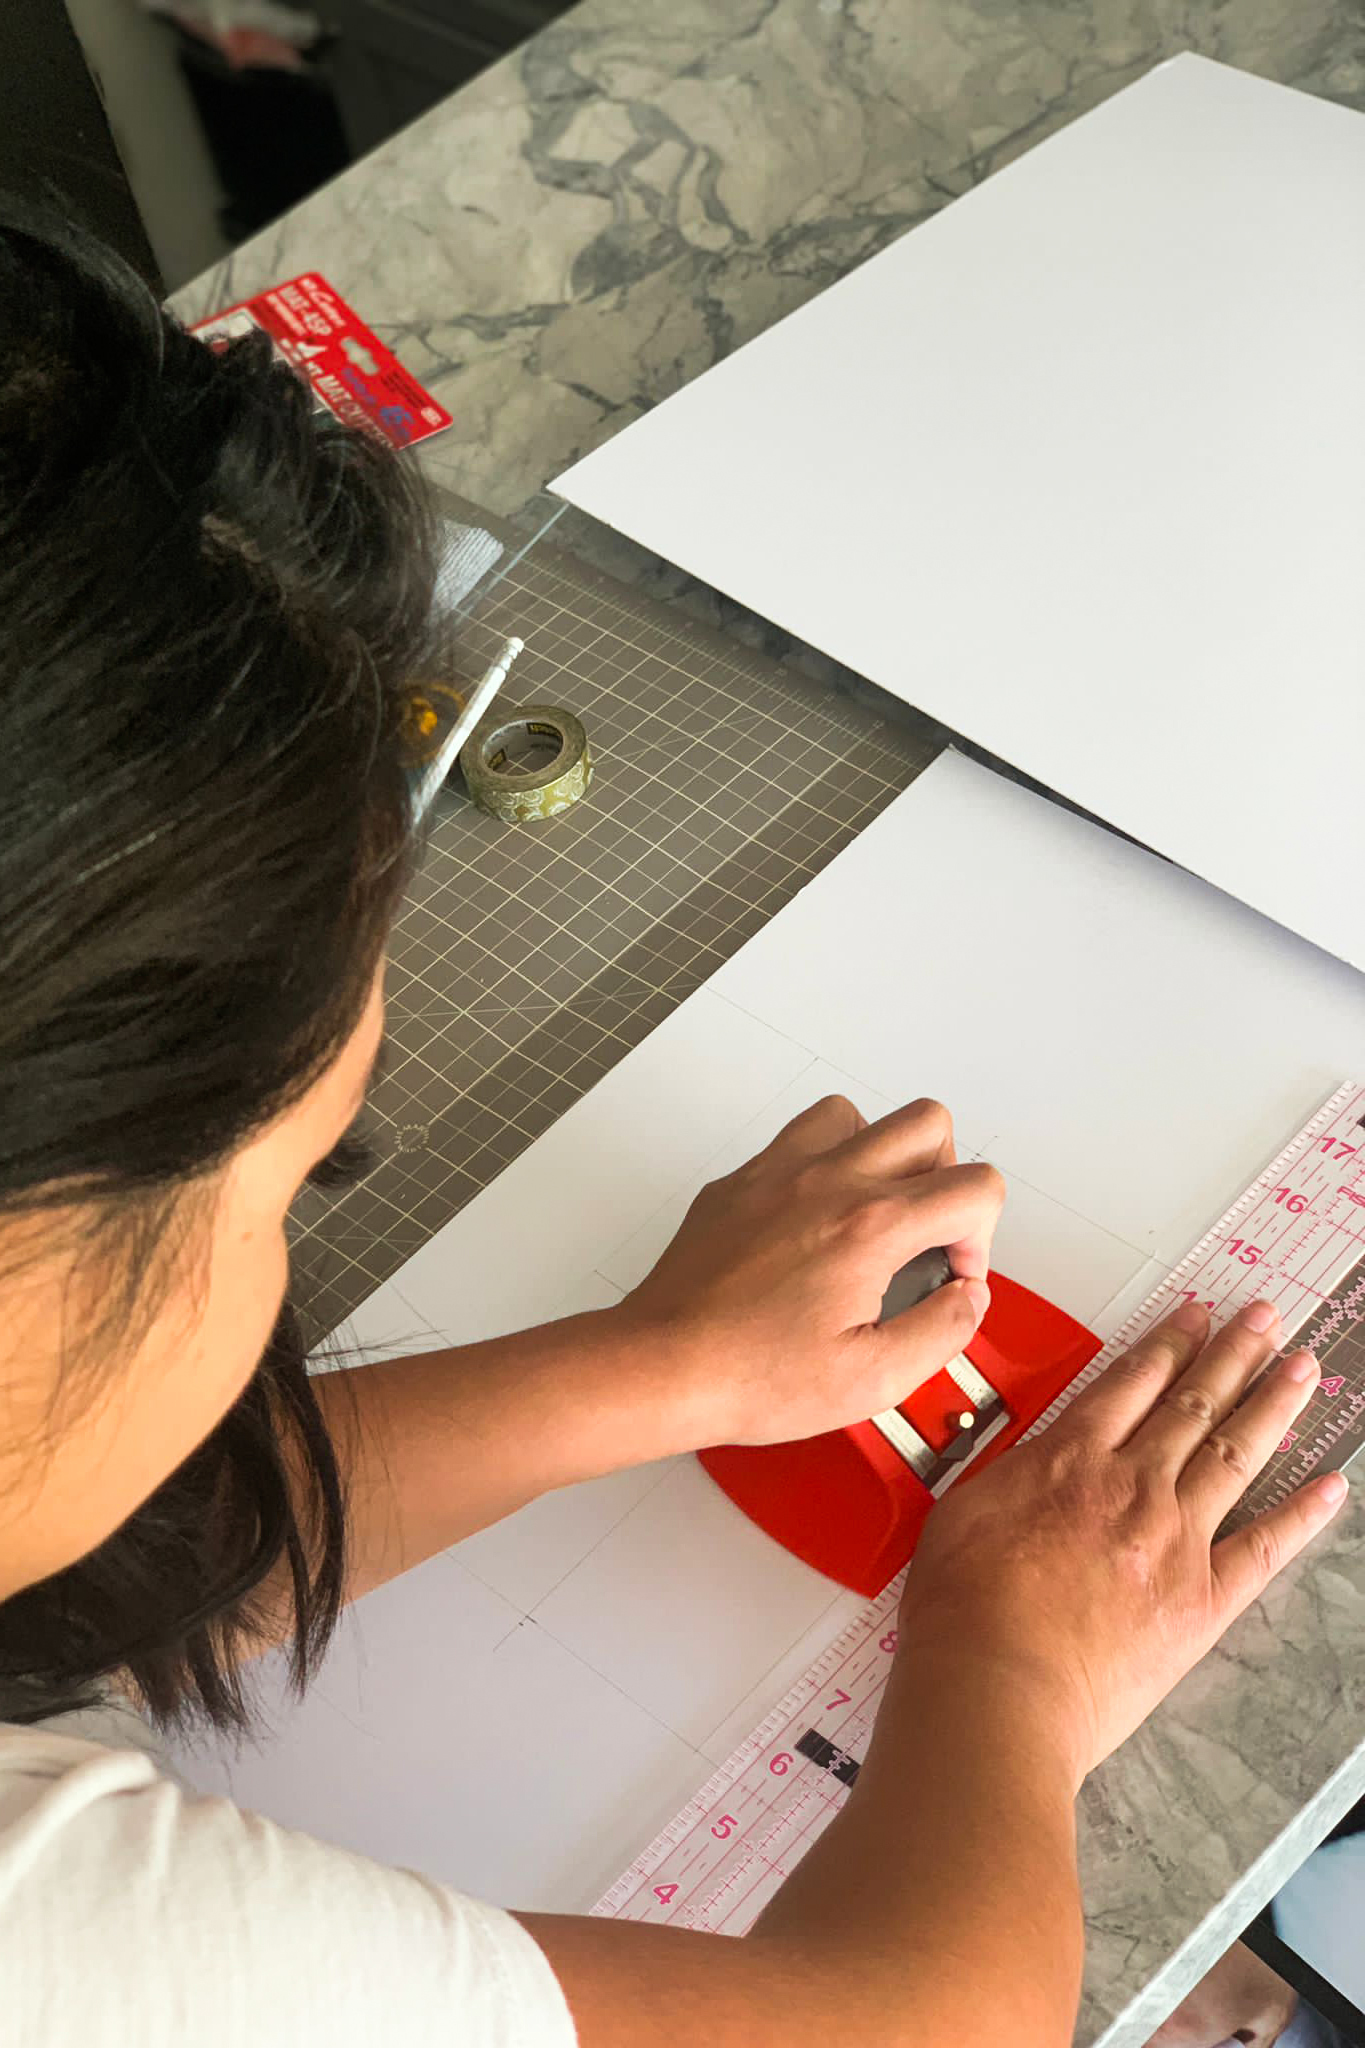
Cut out the photo openings
And here is the most daunting (but totally doable) part of all!
With your mat cutter tool sitting INSIDE the box you drew, line up the guide lines on the tool with your drawn pencil line.
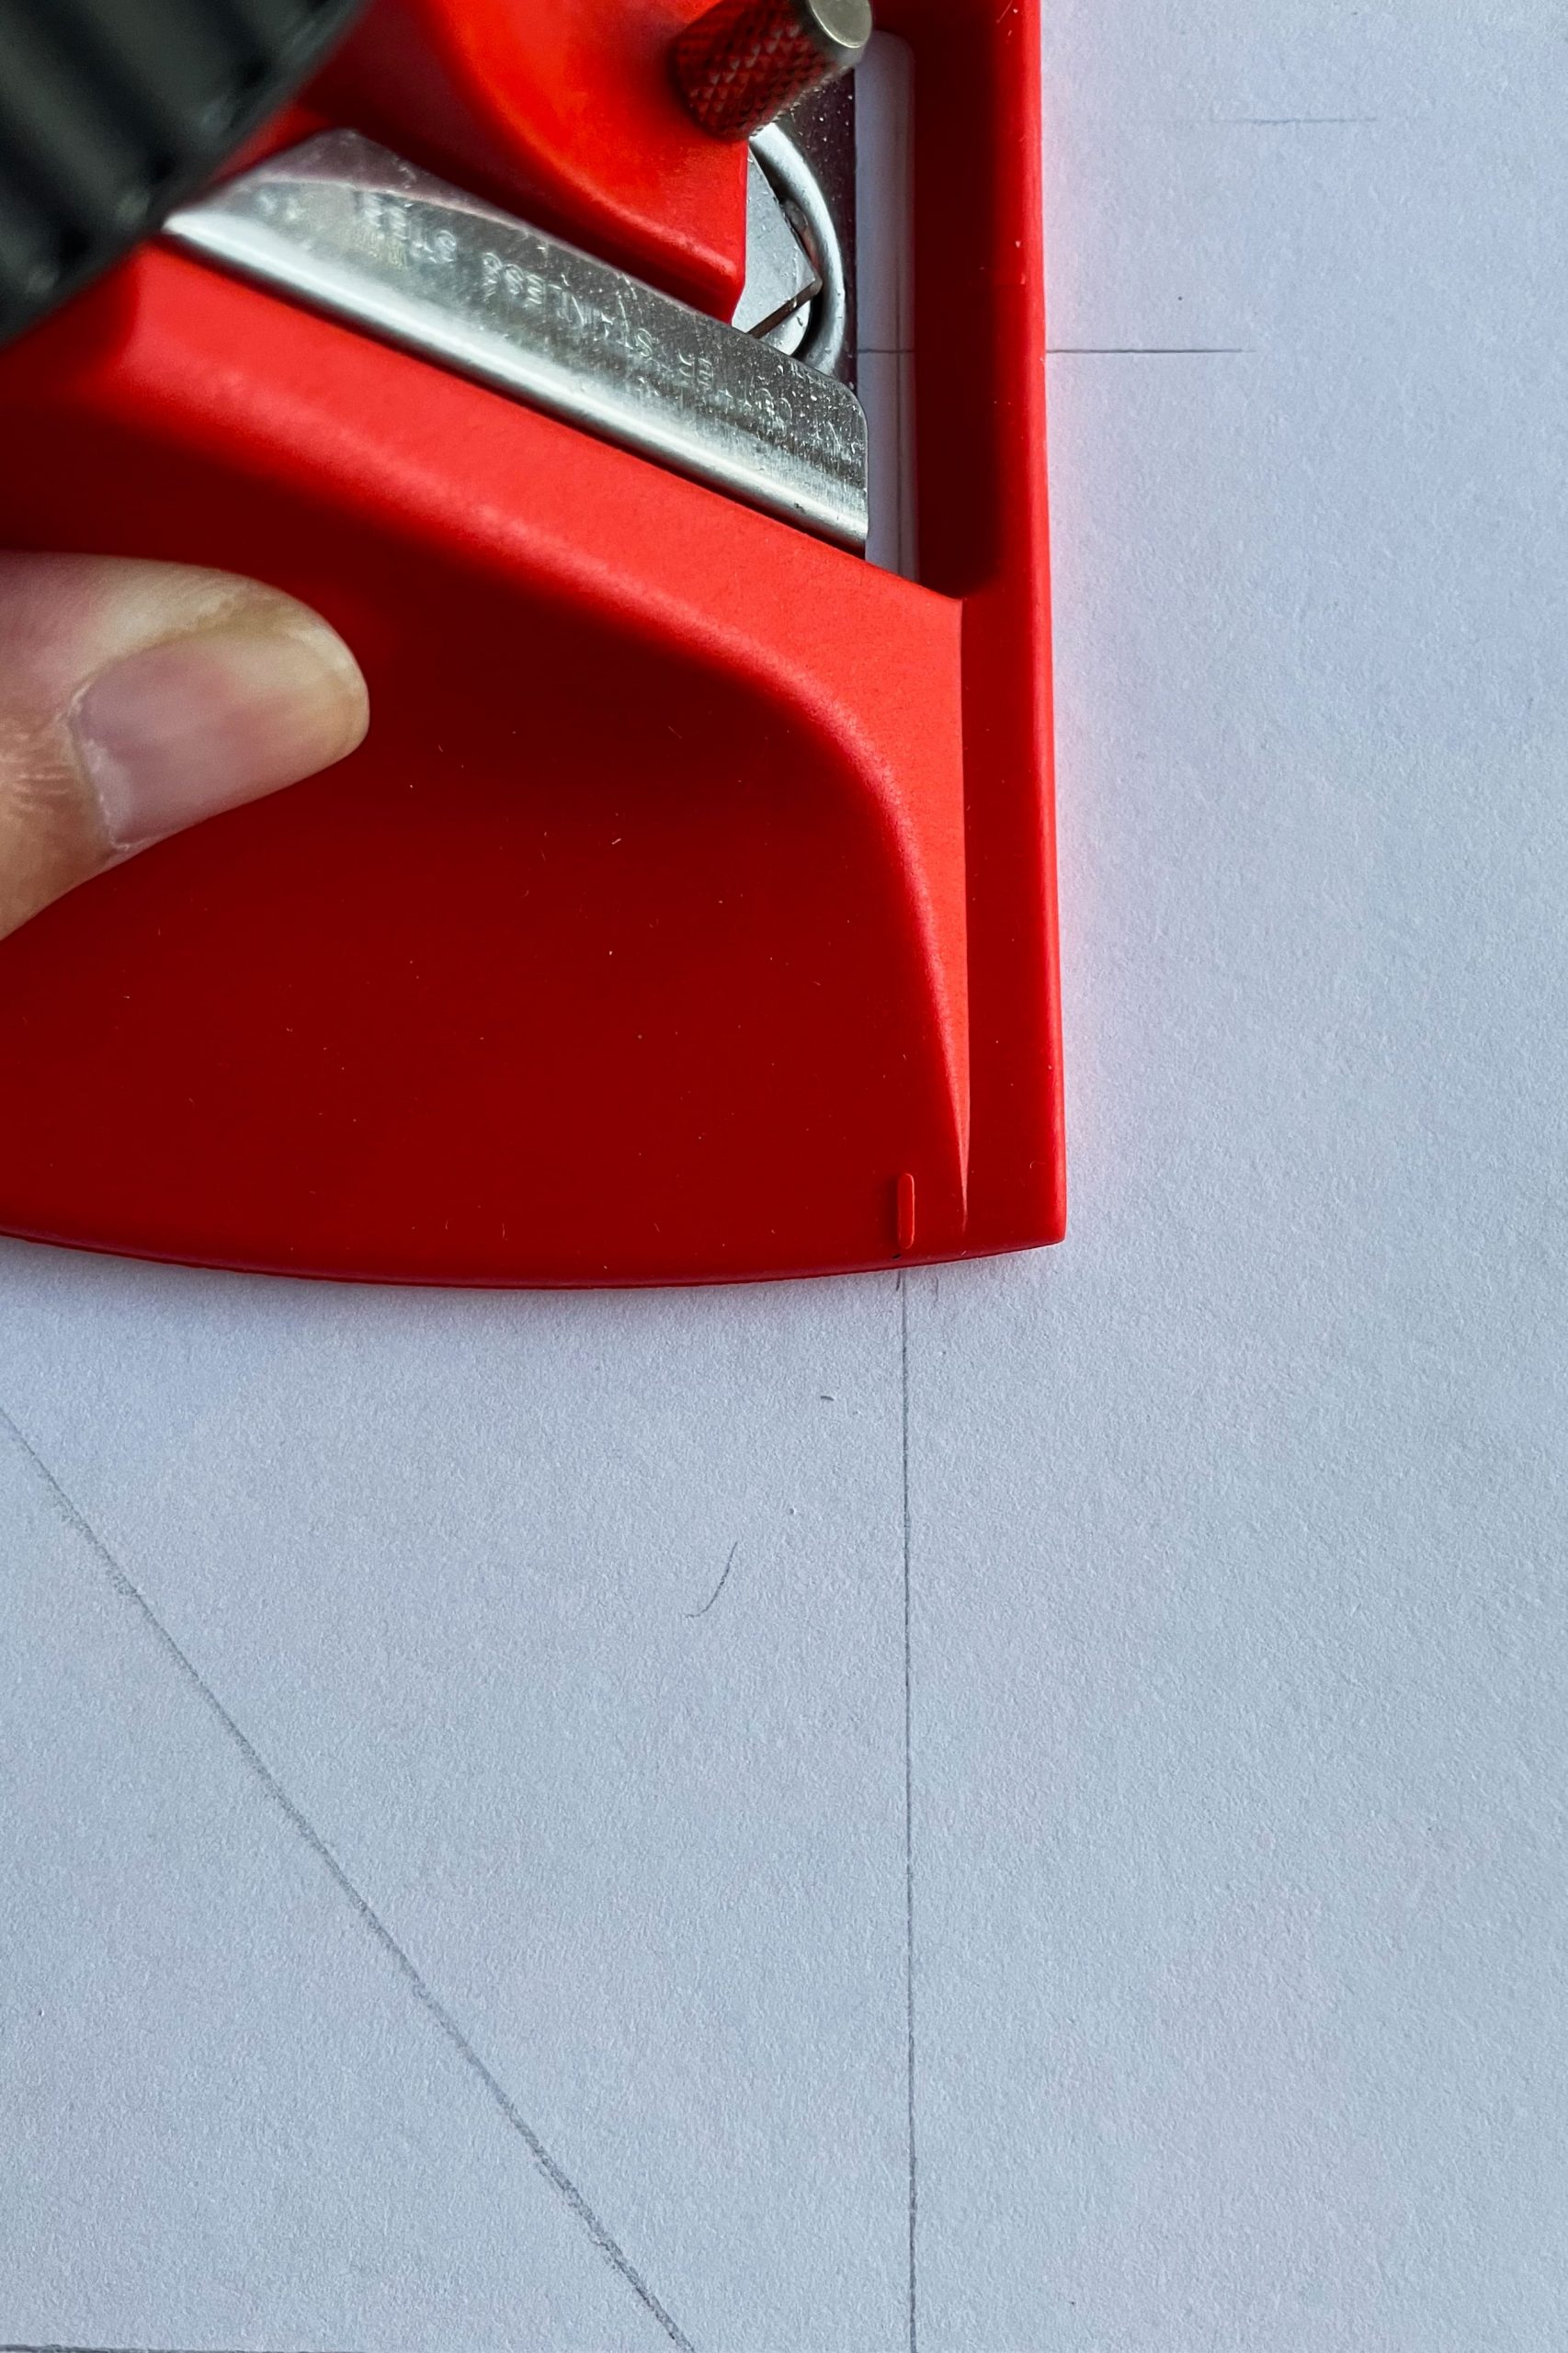
Butt your acrylic ruler up against the cutter to maintain this straight line. Then, bring your mat board cutter to the corner of the marked cutout line.
Slowly press to bring the blade down and eyeball it so that the point of the blade will pierce JUST outside the corner of your mark. Ensuring that you start and end your cut slightly past the corner of your marked cutout is really important.
Press firmly down on your mat board cutter to bring the blade down and slide the cutter along the edge of the acrylic ruler, maintaining even pressure as you go. End your cut JUST outside the corner of your marked line.
Once you commit to cutting a line, finish it! Trust me on this.
Repeat on remaining lines until your opening is cut out. You’ll know your cuts are perfect if you can lift your mat board up and the centre cleanly pops out on its own.
TROUBLESHOOTING: if for one reason or another your centre piece does not pop out cleanly, gently run your rotary cutter or take a sharp x-acto knife to score the cut line again. Do not, I repeat, DO NOT pull your centre piece off.
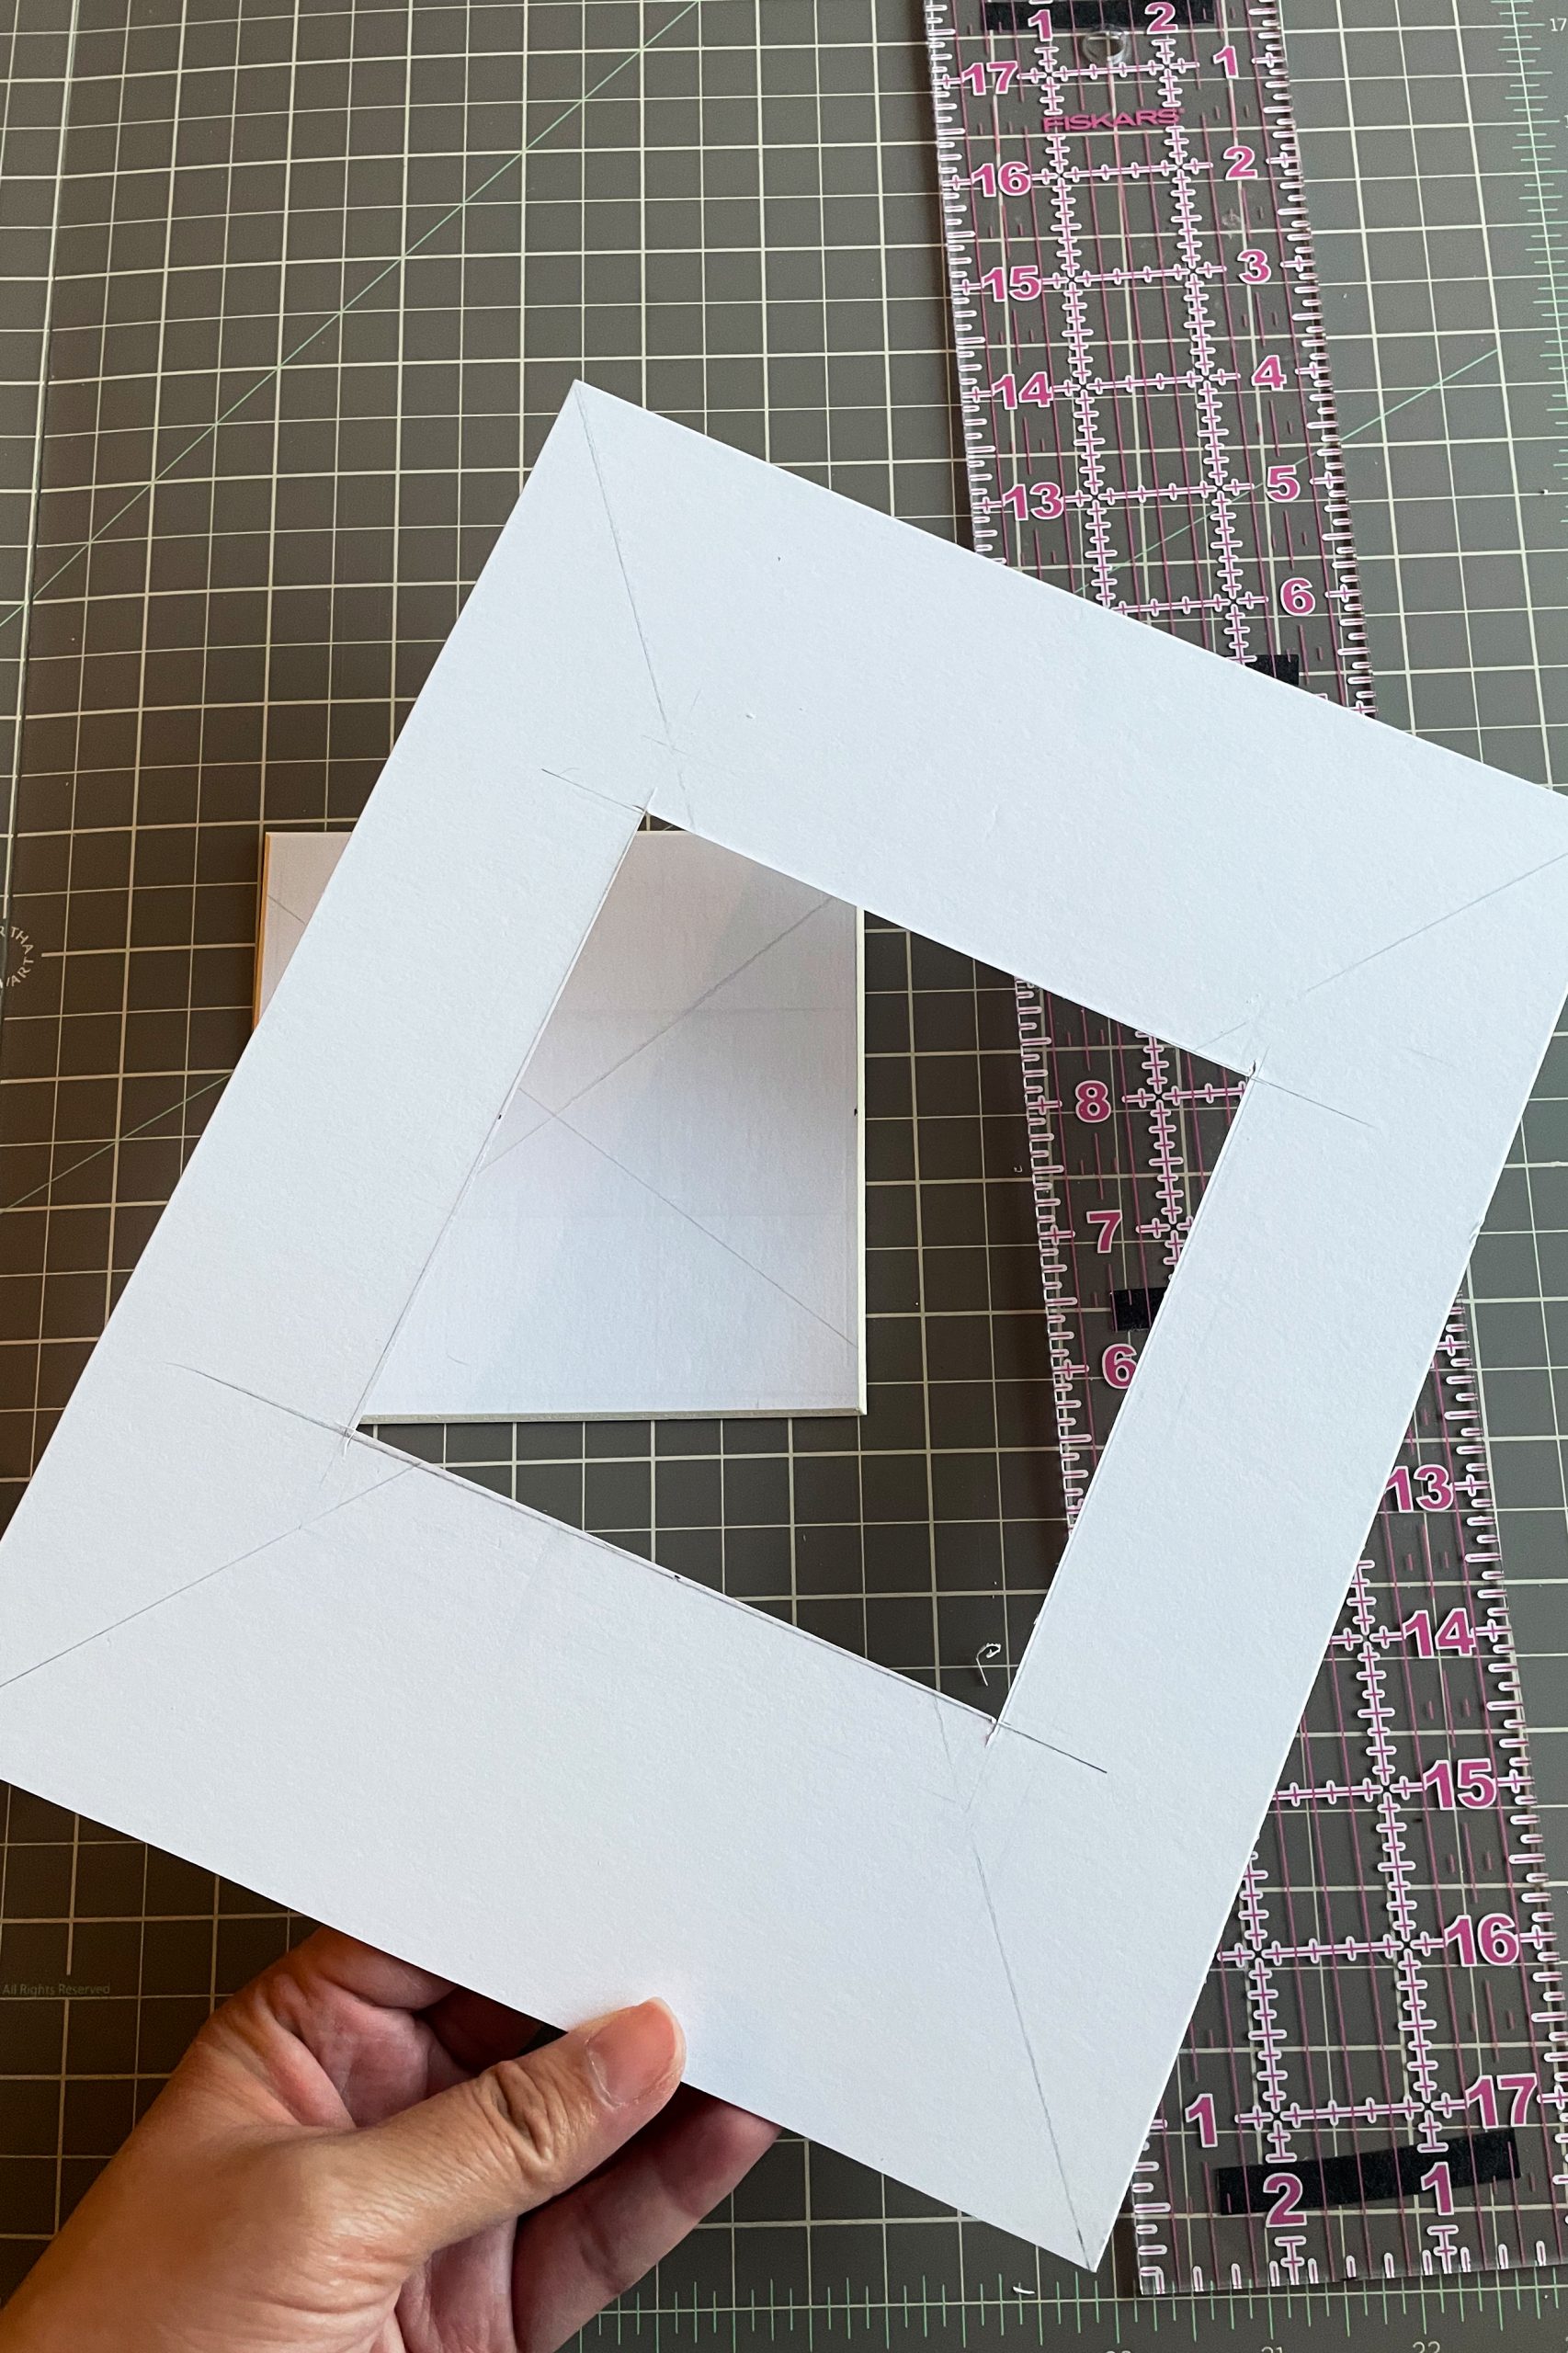
That’s it that’s all!
Now flip your beautiful new custom picture mats around. Tape your photo to the backside of your mat board and mount it in your frame.
VOILA! So. Easy. After screwing up 2-3 of them to start…just account for the fact that you’re going to have a couple garbage ones before you’re a pro at this.
Check out my last post to see all my beautifully cut custom picture mats in their frames up on my gallery wall.
Recap of tips to do it right the first time
- Your first 3 mats will likely be throwaways as you test the depth and pressure, etc. Account for this in your material.
- Make sure you cut past your marked line on each end of it in order for the mat to pop out cleanly.
- Do not start your cut in the centre of your line. This will cause a tiny divit/puncture on the inside edge of your cutout and it sucks. SUCKS I tell you! Always start your cut slightly past the corners you marked.
- The cutting tool comes with anti-slip stickers to place on the backside of your ruler. USE THESE!
- Once you start a cut, finish it so you can ensure you have a nice smooth cut. Kids screaming in the background? House catching fire? Leave it! There are important matters to attend to at hand.
If you don’t want to DIY…
After attempting to cut 3 mat boards and screwing them up royally, I almost gave up! So I jumped onto the Custom Mat website to price out an order for the mat sizes I needed.
Turns out that with the discount they were running, it came out to cost EXACTLY what I had spent on mat board and supplies. Needless to say, I was very tempted to just order the mats and be done with it.
But I already had sunk costs. And I figured that this will not be my last gallery wall. So I talked myself back from the ledge and continued on with the project.
Honestly though…you can totally order from a custom mat cutting shop if the price is right for you and you don’t want to spend money on all the cutting tools. It’s a legitimate option, especially if you catch them running a sale.
There you go! You’re now fully equipped with the knowledge of how to cut your own custom picture mats. Now go forth and create all the beautiful custom gallery photo walls you can.
— Shop The Post —